Two cold rooms can be ordered from the same factory with the same specification — and one runs trouble-free for fifteen years while the other struggles from its first summer. The difference is rarely the equipment. It is usually the installation: the site it was built on, the way the panels went together, and how the refrigeration system was set up and commissioned.
This guide walks through a modular cold room installation from start to finish: the site checks to do before you order, panel assembly, refrigeration hook-up, commissioning, and the mistakes that show up later. It is written for importers, distributors, contractors, and first-time buyers assembling a factory-supplied kit — including rooms exported overseas and installed by a local team.
Read this first: installation must follow the supplier’s drawings and local electrical and refrigeration codes. Ranges in this guide are general industry guidance for planning — exact values for your room come from the project-specific documentation and a qualified installer.
Why Installation Quality Decides How Long the Room Lasts
A cold room is a simple machine in principle: insulated panels create a box, and a refrigeration system removes heat from it. But every part of that system is only as good as its installation.
A poorly sealed panel joint lets warm air in and sends the compressor running longer. A condensing unit in a hot, unventilated corner struggles to reject heat on exactly the days it is needed most. An evaporator with blocked air flow leaves the room cold near the unit and warm at the far end. None of these are equipment faults — the same parts, installed correctly, perform as designed.
For factory-direct buyers, installation quality is also practical: BesCool supplies complete rooms, detailed drawings, and remote engineering support, but the panels are assembled on site by a local team. Knowing what a correct installation looks like is part of buying well.
Before You Order: Six Site Checks That Can Change the Quotation
Site conditions affect the room design itself, not just the installation work. Checking these six items before ordering prevents a room that does not fit, a quotation that misses site work, or an installation that stops halfway.
- Floor condition and levelness. A cold room needs a flat, level floor that carries the weight of panels, equipment, and stored products — a concrete slab is the standard base. If the floor is uneven, plan leveling work: panel systems do not bend to follow a bad floor, and an unlevel room stresses doors and panel joints.
- Drainage point. The evaporator produces condensate (and melt water during defrost). Confirm a drainage point near the room with correct fall so the line runs without siphoning or freezing; freezer rooms may need a heated line or P-trap to prevent ice blockage.
- Power supply and voltage. Refrigeration is electrical. Confirm the supply — single-phase or three-phase, voltage, frequency — and the capacity at the installation point. Export rooms are often built for a specific voltage, so confirm this before ordering, not on installation day.
- Ambient conditions and ventilation. Condensing units reject heat into the surrounding air. In a hot room, tight enclosure, or direct sun, performance drops and running hours rise. Plan a location with free air flow — and if the site is hot or dusty, tell the supplier so the system is selected for the real ambient temperature.
- Ceiling height and available space. The room needs clearance above and around it: for ceiling panel joints, evaporator air throw, and service access to the unit and electrical panel. A room that fits on paper can still fail on site if the ceiling is low or access is narrow.
- Access path and doorways. Panels are large and rigid. Check that every doorway, corridor, lift, and corner between delivery point and final location can take a full panel. If the path is tight, plan a different panel size or an on-site assembly sequence before the container arrives.
Panel Assembly: What “Done Well” Looks Like
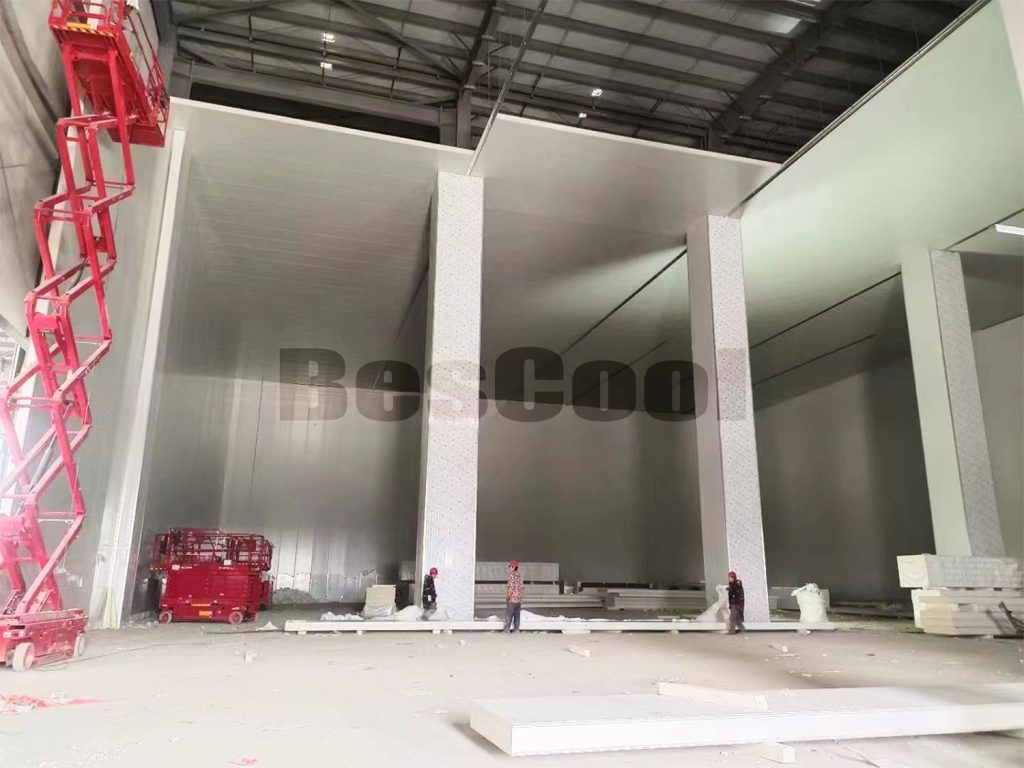
Modular cold rooms are built from insulated panels locked together with cam-lock fasteners. The sequence is standard — floor first, then walls, then ceiling — but the quality is in the details.
- Floor first. Level the floor panels and seal them correctly. Many rooms fail early because the floor was rushed — water finds the smallest gap.
- Work wall by wall, checking joints as you go. Every vertical joint must be pulled tight and clean. Engage cam locks in the correct order and torque them per the supplier’s instructions — a joint that looks closed is not necessarily sealed.
- Seal everything, including the vapor barrier. A cold room is not just an insulated box but a moisture barrier: warm, humid air meeting a cold surface means condensation — and in a freezer, ice. Pay attention to the vapor barrier side, ceiling-to-wall joints, and every penetration.
- Do not skip the threshold details. Door thresholds, floor ramps, and panel-to-floor seals are where air leaks and water damage start.
Follow the supplier’s assembly drawing panel by panel. If your team has never built a panel room, ask for installation guidance or photos before delivery — learning from drawings beats learning from a half-built room.
Fitting the Refrigeration System
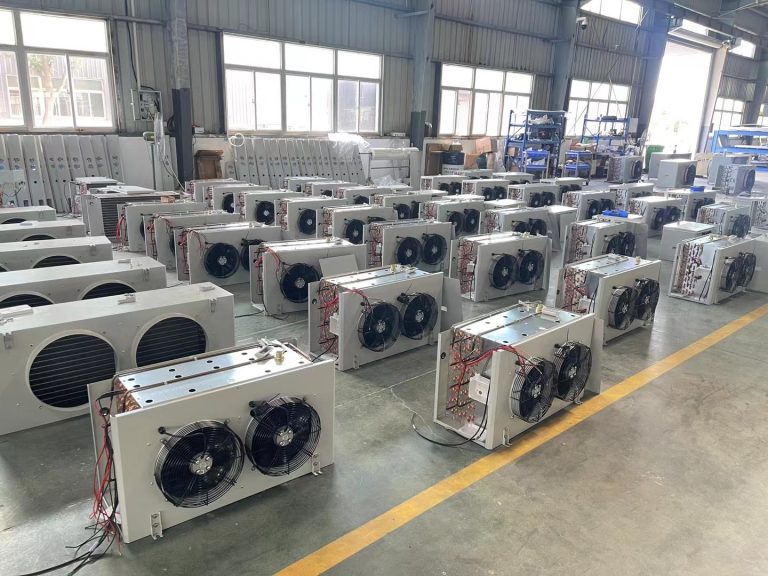
The refrigeration system has two main parts: the evaporator inside the room and the condensing unit outside it. Where and how they are mounted determines most of the system’s long-term behavior.
- Evaporator placement and air flow. Mount the evaporator so its air stream sweeps the room without being blocked by stored product, and keep clearance around the return air side. A blocked evaporator cools unevenly, ices up, and forces extra defrost cycles. Position it so condensate drains correctly and filters, fans, and the drain pan stay accessible.
- Condensing unit location. The unit needs solid, level mounting, weather protection where relevant, and free air flow for heat rejection. Keep the pipe run to the evaporator short and straight; long runs may need oil traps and correct pipe sizing — a design point to raise with the supplier, not to improvise on site.
- Refrigerant lines and insulation. Refrigerant pipes should be routed cleanly, supported properly, and insulated where required. The suction line insulation is not decoration — it prevents condensation and efficiency loss.
- One system per room, matched. The condensing unit and evaporator are selected as a pair. Mixing unmatched components from different projects is a common source of “the room never reaches temperature” complaints. The right starting point is a system selected for your room — which is exactly what a proper selection process produces (see our cold room cooling load guide).
Electrical, Drainage, and Refrigerant-Line Checklist
Before first start-up, walk this checklist:
- Power supply matches the nameplate (voltage, phase, frequency) — and the circuit is properly sized with correct protection
- Earth/ground connection verified; electrical work done or checked by a qualified electrician per local code
- Drain line installed with correct fall; heated drain or trap fitted for freezer applications
- Refrigerant lines leak-checked, insulated, and supported; no kinks or sharp bends
- Condensing unit clear of obstructions; fans free to turn; airflow unobstructed
- Evaporator mounted level with clearance for air flow and service access
- Controller, sensors, and defrost settings checked against the supplier’s recommended values
- Door seals closing fully; door heater (if fitted) and lighting connected
Commissioning: The First Start-Up Matters Most
Commissioning is the controlled first run that proves the system works. It is not the same as switching the unit on and walking away.
- Pressure test and vacuum. Before charging, the refrigerant circuit should be pressure-tested and evacuated to remove moisture and non-condensables. This is skilled work — a proper vacuum takes time and a good vacuum pump.
- Leak check. Verify the circuit holds. A small leak found during commissioning costs minutes; the same leak found in six months costs product.
- Pull-down test. Run the room down to temperature and record the time. A room that cannot pull down within the design time has a problem — better to find it on day one, with the supplier on the phone, than during the first stock-in.
- Defrost and setpoint verification. Confirm defrost cycles complete properly and the room holds temperature at the setpoint without excessive cycling.
- Walk-away test. After a few hours of stable running, check for frost patterns, unusual noise, and correct drain flow.
BesCool factory testing follows the same logic — every unit is pressure-tested, leak-checked, and run under real operating conditions before shipping. On-site commissioning is the mirror of that process, and where installation quality is proven.
DIY or Hire a Local Contractor?
The answer depends less on skill than on what can go wrong.
- Self-installation works for panel assembly when the team follows drawings and the room is straightforward — many importers do it with their own staff. But refrigeration work — line connections, evacuation, charging, electrical — needs certified people and is legally regulated in most markets.
- A local contractor is the safer choice for first-time buyers or complex rooms (long pipe runs, multiple rooms, freezer temperatures, unusual ambient conditions). A good contractor is also your first line of support after installation.
- Either way, the manufacturer matters. A factory-direct supplier like BesCool should provide installation drawings, commissioning guidance, and remote support during first start-up. Ask about this before you order, not after.
A practical middle path used by many importers: your own team assembles the panels under the supplier’s drawing support, and a certified local technician handles the refrigeration and electrical connection and the first pull-down.
Five Installation Mistakes That Always Show Up Later
- Skipping floor insulation or floor sealing. The floor is the most attacked surface in a cold room — water, forklift traffic, and cleaning. Mistakes here become frost, corrosion, and panel damage that are expensive to fix.
- Sealing panel joints badly. Gaps at ceiling-to-wall joints and around penetrations let warm air in continuously. The symptom is “the unit runs all the time” — and the cause is usually invisible.
- Blocking evaporator air flow. Rooms packed to the ceiling, or product stacked right against the evaporator, turn a good system into an uneven, icing, short-cycling one.
- Poor condensing unit placement. Units squeezed into hot, unventilated spaces lose capacity on the hottest days — exactly when the room needs them most.
- Skipping commissioning. Starting the system without a proper pull-down test and setpoint verification means small problems become product losses.
Frequently Asked Questions
How long does a cold room installation take?
For a standard modular room, panel assembly typically takes one to three days for a small team; refrigeration connection, electrical work, and commissioning add one to two days more. The critical path is usually site preparation — if floor, power, and drainage are not ready, installation stops.
Can my own team install it, or do I need a contractor?
Panel assembly can be done by your own team with the supplier’s drawings and guidance. Refrigerant and electrical work should go to certified technicians — in most markets it is a legal requirement, and it protects your warranty and product.
Do I need a concrete floor for a cold room?
A flat, level, load-bearing floor is required — a concrete slab is the standard solution. The exact requirement depends on room size, application, and floor-panel type; confirm it during quotation, not after delivery.
What power supply does a cold room need?
It depends on system size and location — commonly single-phase or three-phase at the local voltage and frequency. The supplier must know this before the system is built, because export units are often configured for a specific voltage. Check the unit nameplate before connecting.
Can the manufacturer provide installation drawings and remote support?
Yes. A factory-direct supplier should provide assembly drawings, installation guidance, and remote engineering support for commissioning. Confirm what installation documentation and support are included when you request a quotation — a fair question to ask any supplier.
Need Installation Support for Your Cold Room Project?
A well-installed cold room starts before the panels arrive — with the site checks above, a system selected for your real conditions, and a supplier that supports you through installation.
BesCool supplies complete modular cold rooms, condensing units, and evaporators with installation drawings and remote engineering support worldwide. To receive a layout, an installation checklist, and a factory-direct quotation, send your site dimensions, photos, and power supply details through our contact form. Not all details ready? Send what you have and mark the rest for discussion.
Final equipment selection and installation should follow a project-specific refrigeration load calculation and the supplier’s drawings, completed by qualified engineers — the standard BesCool applies to every unit tested in our factory before shipping.
Related guides: Cold Room Cooling Load: What Information Is Needed for Sizing? | How to Choose a Condensing Unit for a Cold Room